How Thick Does Ice Need to Be to Fish?
Oh, the thrill of stepping out onto a frozen lake, gear in hand, with the promise of a winter bite beneath the ice! But let's be real, that excitement often comes with a healthy dose of anxiety. Every year, we hear stories, or perhaps even experience ourselves, the chilling uncertainty of ice conditions. "Is it thick enough?" "Will it hold?" It's a question that weighs on every ice angler's mind, and rightly so, because safety is paramount when you're out on the hard water. This guide is here to cut through the guesswork and provide you with a comprehensive understanding of how thick the ice really needs to be for a safe and successful Kansas ice fishing adventure.
Understanding Ice Thickness and Safety
When you're eyeing that frozen expanse, it's easy to assume that if it looks solid, it is solid. But ice is a fickle beast, constantly changing, and its strength isn't just about how many inches it measures. Knowing the general guidelines is a great starting point, but always remember that these are just that – guidelines. The true measure of safety comes from careful, continuous assessment.
The Critical Numbers for Ice Fishing
Let's get down to some widely accepted recommendations for ice thickness. These numbers are a good benchmark, but they don't account for every variable, so always proceed with caution.
- 2 inches or less: Absolutely NO ice fishing. This ice is considered unsafe for any activity. It might look solid near the shore, but it's paper-thin in many spots.
- 4 inches: This is the absolute minimum for walking out onto the ice for a single angler. Even at this thickness, you should be extremely cautious, spreading your weight, and moving slowly. It's really for a solitary angler, perhaps with a spud bar, actively testing the ice as they go.
- 5-7 inches: Generally considered safe for small groups of anglers or for activities like ice skating. This is where many of us feel a bit more comfortable, but vigilance is still key. If you're bringing an ice shelter or a lot of gear, aim for the higher end of this range.
- 8-12 inches: At this thickness, you can usually feel confident taking a snowmobile or an ATV onto the ice. This is substantial ice, but remember, heavy vehicles create pressure cracks, and you should always stay aware of your surroundings and avoid concentrated areas.
- 12-15 inches: For light vehicles like small cars or trucks. This is serious ice, but it's rare to see this consistently across many Kansas lakes. Even with this much ice, avoid parking vehicles too close together, and be aware of potential slush pockets or areas with current.
It's important to internalize these figures, but equally important to understand that they are ideal scenarios. Real-world conditions often throw curveballs. If you're new to the sport, consider our full Kansas Ice Fishing Guide for a broader overview of getting started safely and effectively.
Why Ice Thickness Varies
If only ice formed uniformly! Unfortunately, that's rarely the case. Several factors contribute to why ice can be 8 inches thick in one spot and a mere 2 inches just yards away.
Think about the dynamics of a lake or reservoir. Areas with inlets or outlets, even subtle ones, will have moving water beneath the surface. This current prevents ice from forming properly or can erode existing ice from below. Imagine a hidden spring bubbling up from the lakebed – it creates a localized warm spot that keeps the ice thin, even if the rest of the lake is frozen solid. Many Kansas lakes, especially larger reservoirs like Milford Lake or Cheney Reservoir, have areas prone to currents and springs. It's why one part of the lake might be buzzing with anglers while another remains completely open water. Always approach new areas with a fresh perspective and don't assume consistency.
Snow cover is another huge factor. While a fresh blanket of snow looks picturesque, it acts as an insulator, preventing colder air from reaching the ice and thickening it. It can also create "snow ice" or "slush ice," which is significantly weaker than clear, black ice. Snow can also hide hazards like pressure ridges, open water, or areas of weak ice, making visual assessment nearly impossible. A good rule of thumb is that ice covered with snow is about half as strong as clear, blue ice of the same thickness.
The Dangers of "Safe" Ice
The term "safe ice" can be misleading because even ice that meets the thickness recommendations can pose hidden dangers. Pressure ridges are a prime example. These occur when large sheets of ice expand and contract, pushing against each other and creating cracks or ridges. While they might look like mere bumps, they can be areas of instability, often with open water beneath or very thin ice. Driving an ATV or even walking across one without checking could lead to a sudden plunge.
Another concern is ice that forms and thaws repeatedly. This creates a brittle, crystalline structure that lacks the strength of solid, continuous ice. This is particularly common in early or late winter, or during warm spells. You might measure 6 inches, but if it's "rotten" ice, it might only support the weight of 2-3 inches of solid ice. It's often milky white or opaque, differing distinctly from strong, dark blue or clear ice. Always remember, just because a buddy tells you "it's 6 inches over here" doesn't mean it's 6 inches everywhere, or that those 6 inches are actually strong. Each step is a new test.
How to Accurately Measure Ice Thickness
Relying on guesswork or someone else's word is a recipe for disaster. The only way to truly know the ice thickness and quality is to measure it yourself, frequently and consistently. This isn't just about drilling a hole near your fishing spot; it's about checking as you go.
Essential Tools for Ice Measurement
Before you even step foot on the ice, you need the right tools. Don't skimp on these; they are your first line of defense.
- Spud Bar: This is arguably the most crucial tool for early-season ice and for probing unfamiliar territory. A spud bar is a heavy steel chisel on a long handle, and it's used to test the ice ahead of you. You strike the ice firmly; if it goes through in one or two hits, you know the ice is dangerously thin. It's an invaluable tool for continuous testing, especially when you're away from established paths. You can find robust spud bars and ice picks on platforms like Amazon, making them easily accessible for your safety kit.
- Ice Auger: A manual or power ice auger is essential for drilling fishing holes, but also for getting a precise measurement. Drill a hole, clear out the slush, and then use your tape measure. For deeper ice, a power auger like those from brands such as Eskimo or ION can make quick work of drilling multiple test holes.
- Tape Measure: A standard retractable tape measure is perfect for getting an exact reading once you've drilled a hole. Make sure it's long enough to reach through your thickest anticipated ice.
- Ice Picks: Worn around your neck, these sharp, handheld tools are critical if you do fall through. They allow you to get a grip on the ice and pull yourself out. They are a non-negotiable piece of safety equipment. We'll delve deeper into safety gear in our guide on Kansas Ice Fishing Safety Tips.
Step-by-Step Measurement Process
It's not enough to have the tools; you need to know how to use them properly.
- Start at the Shore: Never just walk onto the ice. Begin at the access point. Use your spud bar to test the ice near the edge. Often, ice near the shore can be weaker due to fluctuating water levels or sun exposure.
- Test as You Go: As you move out, use your spud bar every few steps, especially in areas where the ice color changes, or if you encounter snowdrifts. Tap, tap, tap. Listen to the sound. Solid ice makes a clear, ringing sound. Thin ice sounds hollow or dull.
- Drill Test Holes: Once you feel confident about an area, drill a test hole with your auger. This gives you a precise measurement. If you're on 4 inches, you know you need to be extra cautious. If it's 8 inches, you can breathe a little easier, but still keep testing.
- Measure Accurately: After drilling, clear the slush from the hole. Hook your tape measure on the top edge of the ice and drop it down until the end touches the water below. Read the measurement at the top of the ice. Repeat this process regularly, especially if you move to a new section of the lake or if conditions seem to change. For specific rules about what species you can target in winter, check out Fish You Can Catch Ice Fishing in Kansas.
Reading the Ice: Interpreting Ice Color and Texture
The visual appearance of ice tells a story about its strength. Learning to read these visual cues can be as important as mechanical measurement.
- Clear, Blue/Black Ice: This is the strongest ice. It forms when temperatures drop steadily, and there's little snow. It's dense, solid, and structurally sound. This is the ice you want to see. An inch of clear ice is far stronger than an inch of white ice.
- White/Opaque Ice (Snow Ice): This forms when a layer of snow melts and refreezes, or when slush freezes. It's full of air bubbles, making it much weaker than clear ice. If you're walking on 6 inches of white ice, it might only have the load-bearing capacity of 3-4 inches of clear ice. Be very wary of large expanses of white ice.
- Slush Ice: This is partially frozen, saturated snow. It offers almost no support and is a sign of extremely unsafe conditions, or that the ice is actively deteriorating. Avoid at all costs.
- Honeycomb Ice: In late winter, as temperatures rise, ice can develop a honeycomb-like structure due to melting from above and below. This ice might look thick, but it's incredibly weak and can give way suddenly. It's often associated with "rotten ice" and signals the end of the ice fishing season.
Factors Affecting Ice Safety Beyond Thickness
Beyond the numbers, a host of environmental factors can turn a seemingly safe ice sheet into a dangerous trap. Understanding these nuances is crucial for any responsible angler venturing out onto a frozen Kansas lake.
Weather Conditions
Mother Nature plays a significant role in ice stability. What was safe yesterday might not be today.
- Temperature Fluctuations: Consistent sub-freezing temperatures are ideal for strong ice. However, if temperatures swing dramatically, with warm days followed by cold nights, the ice can become brittle and fracture easily. A sudden warm spell can quickly degrade even thick ice, particularly if accompanied by rain. This is especially true in Kansas, where winter weather can be notoriously unpredictable.
- Sunlight: Direct sunlight, especially as the winter progresses into late February and March, can significantly weaken ice. Darker objects on the ice, like your ice shanty or even rocks, absorb more solar radiation and can cause localized melting. Always be mindful of the sun's intensity, even on cold days.
- Snow Cover: As mentioned earlier, snow acts as an insulator, slowing down ice growth. A heavy snowfall after initial ice formation can effectively halt further thickening. Furthermore, deep snow can obscure dangerous cracks or open water, making visual assessment nearly impossible. Heavy snow can also weigh down the ice, pushing water up through cracks to create slush layers on top. If you're wondering How Thick Does Ice Need to Be to Fish?, remember that snow cover changes the answer dramatically.
Water Movement and Currents
Hidden currents are often the most insidious dangers on any frozen body of water.
- Inlets, Outlets, and Constrictions: Any area where water flows in or out of a lake, or where the lake narrows, will likely have thinner ice due to currents. Rivers, even seemingly slow ones like parts of the Kansas River, rarely freeze to a safe thickness due to constant flow. Even in large reservoirs, culverts, bridge pilings, and dam areas are notorious for thin ice. Always give these areas a wide berth.
- Underground Springs: Many lakes and reservoirs have natural springs or groundwater seeps that continuously introduce warmer water, creating localized areas of dangerously thin ice, often referred to as "soft spots" or "honey holes" in a treacherous way. These can be impossible to spot from above, which is why constant spud bar testing is critical.
- Prop Wash and Boat Traffic: While rare during prime ice fishing season, areas used by late-season boats or prop wash from unexpected activity can create zones of weakened ice that persist. It’s a less common factor for ice fishing but worth being aware of, especially on bodies of water that might see occasional open-water usage.
Ice Type and Quality
Not all ice is created equal, and understanding the differences can save your life.
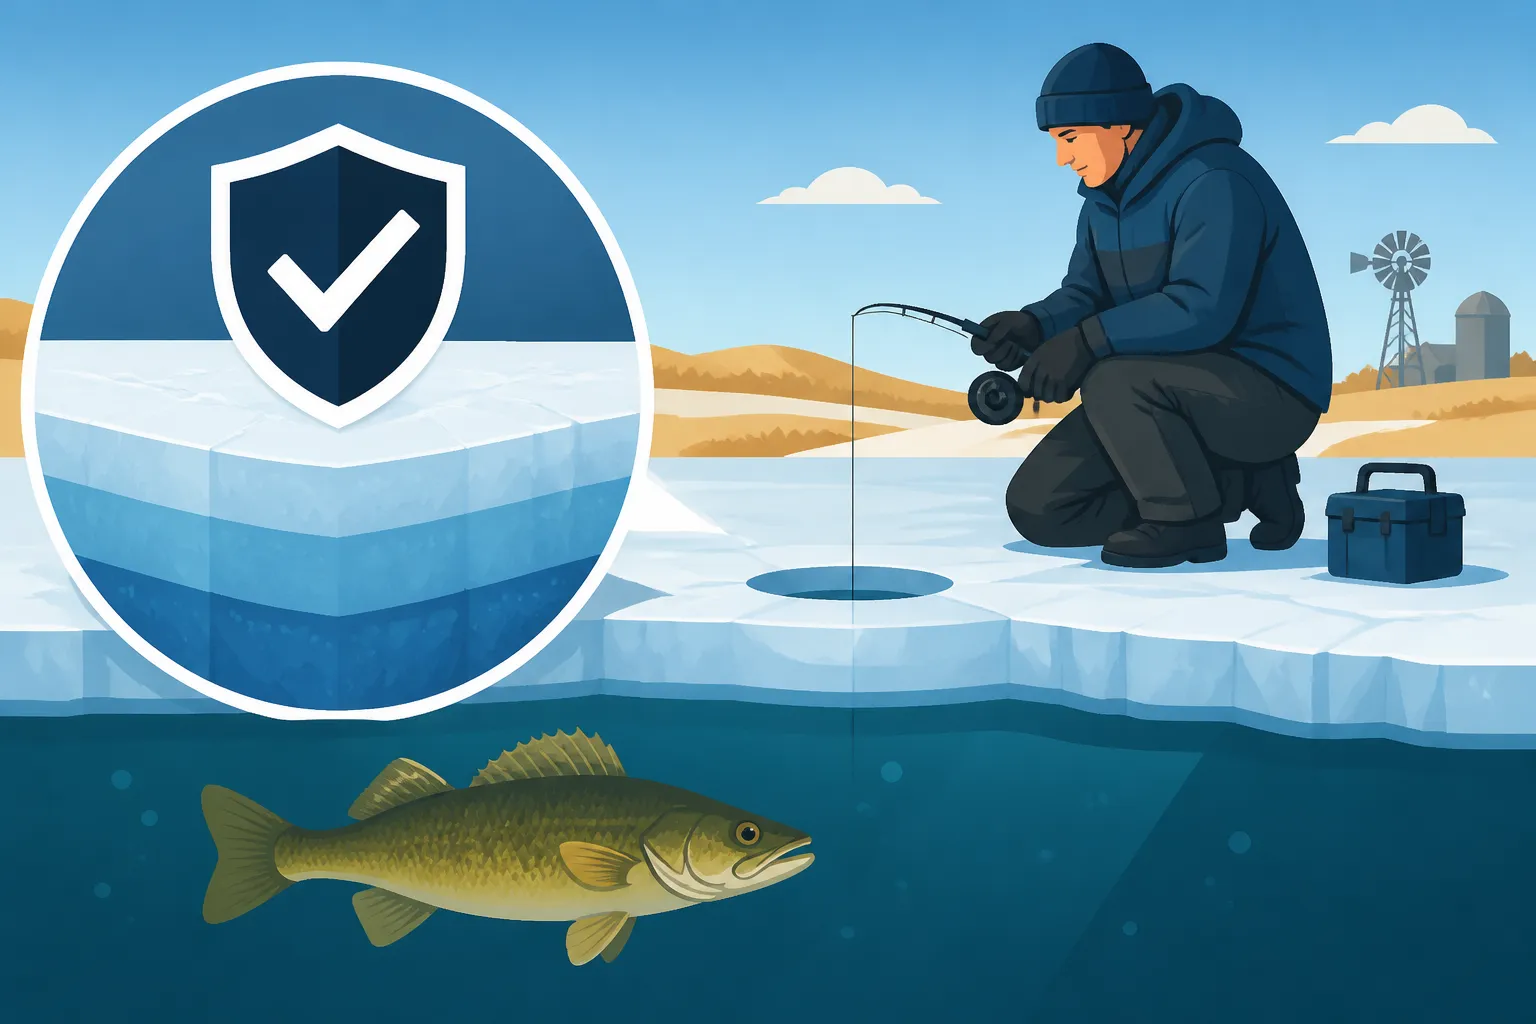
- Blue Ice (Clear Ice): This is the strongest, most stable ice. It forms directly from the freezing of water and has a distinct dark or bluish tint, allowing you to often see into the water below. When you measure 4 inches of clear blue ice, you're generally much safer than with 4 inches of white ice. This is the gold standard for ice anglers.
- White Ice (Snow Ice/Slush Ice): This ice is significantly weaker. It forms when snow or slush freezes, incorporating many air pockets. It appears opaque and white, making it difficult to judge its true thickness or underlying condition. It can be half as strong as blue ice. If you're mostly seeing white ice, double the recommended thickness for safety.
- Grey Ice (Melting Ice): Grey ice indicates that water is present in the ice structure, meaning it's melting and deteriorating. This is extremely dangerous. Avoid any ice with a grey appearance. It suggests the ice is no longer frozen solid and is losing its structural integrity.
Essential Safety Gear and Practices for Kansas Ice Anglers
No matter how confident you are in your ice measurement skills, accidents can happen. Being prepared isn't just a good idea; it's absolutely non-negotiable for anyone venturing onto the ice.
Must-Have Safety Equipment
Equipping yourself with the right safety gear is as important as having your auger and fishing rods. These items are literally life-savers.
- Ice Picks: These handheld tools, connected by a cord and worn around your neck, are paramount. If you fall through, they give you the grip needed to pull yourself out of the water and back onto solid ice. Practice using them in a controlled environment (like swimming pool with a friend) so the motion is second nature.
- Rope/Throw Bag: A 50-foot length of buoyant rope, ideally in a throw bag, should be accessible to everyone in your group. If someone goes through, you can throw the rope to them from a safe distance. Having one on hand can prevent a single accident from becoming a double tragedy.
- Personal Flotation Device (PFD): Wearing a PFD, even a lightweight inflatable one, is a smart choice, especially during early or late ice. It won't keep you from getting wet, but it will keep you afloat, conserving critical energy and body heat while you work to get out or wait for rescue. Many modern ice fishing suits even come with built-in flotation.
- Warm, Layered Clothing: While not strictly "safety gear" in the same vein as ice picks, appropriate clothing is vital for survival if you do go through. Hypothermia sets in rapidly in cold water. Layers of wool or synthetic materials that wick moisture away are far better than cotton. Don't forget a change of clothes in a waterproof bag, stored in your vehicle.
Buddy System and Communication
Never, ever ice fish alone. It's a fundamental rule that should be etched into every ice angler's mind.
- The Power of Two (or More): Going with a buddy or a group means there's always someone to assist if an emergency occurs. If you fall through, a partner can throw you a rope, call for help, or even offer a hand. They can also perform vital first aid. The simple presence of another person dramatically increases your chances of survival.
- Tell Someone Your Plans: Even if you're with a group, always let someone not on the ice know your exact location and your expected return time. Give them a detailed plan: which lake, which access point, and who you're with. If they don't hear from you, they know to initiate a search. This is true for all outdoor adventures, but especially on potentially dangerous ice.
- Charged Phone: While signal can be spotty on some remote Kansas lakes, always have a fully charged cell phone in a waterproof case. It's your lifeline to emergency services. Consider a portable power bank for extended trips.
Emergency Preparedness: What to Do If You Fall Through
The worst-case scenario is falling through the ice. Knowing what to do in those terrifying moments can be the difference between life and death.
- Don't Panic: This is easier said than done, but panic causes you to waste precious energy. Take a deep breath.
- Turn Back the Way You Came: The ice you just broke from was strong enough to support you moments before. That's likely the strongest ice around.
- Use Your Ice Picks: Dig your ice picks into the ice and kick your feet, trying to get your chest onto the ice. Roll onto your stomach away from the hole and then crawl, rather than stand, to distribute your weight.
- Signal for Help: Yell loudly for anyone nearby. If you have a whistle, use it.
- Remove Heavy Clothing (if possible): While some believe you should keep all clothes on for insulation, heavy boots or coats can weigh you down. If possible, quickly shed anything that is pulling you under.
- Seek Warmth Immediately: Once out, get to shelter and strip off wet clothes immediately. Get into dry clothes (which you wisely packed in a waterproof bag) and generate body heat. Get medical attention, even if you feel fine, as secondary effects like hypothermia can be delayed. For more in-depth advice on what to do in such a situation, refer to our Is Ice Fishing Safe on Lakes? article.
Kansas-Specific Ice Fishing Considerations
Ice fishing in Kansas has its own unique charm and challenges. From our often-mild winters to the characteristics of our lakes, there are a few things local anglers should keep in mind.
When Does Ice Fishing Season Typically Start in Kansas?
Unlike northern states where consistent ice arrives like clockwork, Kansas's ice fishing season can be fleeting and unpredictable.
Typically, dependable ice doesn't form until mid-to-late January, and even then, it's highly dependent on sustained periods of well-below-freezing temperatures. Early December might see some small ponds freeze, but large reservoirs rarely offer safe ice before the new year. February often provides the most consistent and safest ice, but even then, a warm front can quickly change conditions. Anglers often keep a close eye on weather forecasts and reports from the Kansas Department of Wildlife and Parks (KDWP) or local bait shops. The season can also end as abruptly as it begins, often by late February or early March, when longer daylight hours and warming trends rapidly degrade the ice.
Popular Kansas Lakes for Ice Fishing
While most large Kansas reservoirs can freeze, some are more consistently reliable and popular for ice fishing than others.
- Small Community Ponds: These often freeze first and offer some of the earliest and safest ice fishing opportunities. Many urban and community fishing lakes managed by KDWP are popular for panfish like bluegill and crappie.
- Eastern Kansas Reservoirs: Lakes like Clinton Lake, Hillsdale Lake, and Melvern Lake sometimes offer ice fishing opportunities, though their proximity to more fluctuating weather patterns means consistent safe ice isn't a guarantee every winter. These can be great for crappie and channel catfish through the ice.
- Western Kansas Reservoirs: Generally, western Kansas experiences colder, more consistent winter temperatures, which can lead to thicker, more reliable ice on lakes like Kirwin Reservoir or Webster Reservoir. These are often targeted for walleye and wipers once conditions allow.
Always remember that even on popular lakes, specific areas can be dangerous. For instance, while some parts of Milford Lake might freeze, other areas with strong currents might never be safe. It's why anglers frequently ask, Is Milford Lake Good for Ice Fishing?. The answer is always, "It depends on the conditions and where you're fishing!"
Where to Find Ice Condition Reports
Reliable, up-to-date information is your best friend when it comes to ice fishing.
- Kansas Department of Wildlife and Parks (KDWP): The KDWP website and social media channels are excellent resources. While they might not provide hyper-specific, real-time ice thickness for every single spot, they often issue general advisories and updates on overall conditions across the state. They also regulate Kansas Ice Fishing License Requirements and other rules.
- Local Bait and Tackle Shops: These are often the absolute best source for current, hyper-local ice conditions. Shop owners and employees talk to anglers coming off the ice all day and can give you specific reports on particular lakes or even sections of a lake. Call ahead or stop in to chat with them. They often know where the fish are biting and, more importantly, where the ice is safe.
- Online Forums and Social Media Groups: Many Kansas-specific fishing groups on Facebook or online forums are active with anglers sharing real-time reports. Be cautious and verify information, but these can be valuable for getting a sense of what's happening on the ice. Use this information as a guide, but always double-check with your own measurements.
A final word of caution: conditions can change rapidly. What was safe in the morning might not be safe in the afternoon, especially on warmer, sunny days. Always prioritize safety over catching fish. A fish on the line is never worth risking your life.
Ice Thickness Guidelines Summary Table
To help you quickly reference the general guidelines, here's a table summarizing the recommended minimum ice thickness for various activities. Remember, these are ideal situations, and actual conditions (ice type, snow cover, currents) always factor into real-world safety.
| Activity | Minimum Ice Thickness (Clear, Blue Ice) | Additional Considerations |
|---|---|---|
| Individual Foot Travel | 4 inches | Proceed with extreme caution, test constantly with a spud bar. |
| Small Group (Walking) | 5-7 inches | Spread out, avoid congregating. |
| Snowmobile / ATV | 8-12 inches | Avoid pressure ridges, heavy snow areas, and swift currents. |
| Light Vehicle (Car/Truck) | 12-15 inches | Park far apart, know the lake, check for springs/currents. |
| Heavy Vehicles | 15 inches + | Generally not recommended for recreational ice fishing. |
Disclaimer
The information provided in this guide is for general informational purposes only and is not a substitute for personal judgment, common sense, and adherence to all local regulations. Ice conditions are highly variable and can change rapidly. Always exercise extreme caution when on or near ice. It is the responsibility of each individual to assess current conditions, measure ice thickness, and take appropriate safety precautions. The author and publisher are not responsible for any accidents, injuries, or fatalities that may occur as a result of using this information. Always put safety first.