Best Fish Finder Under $300 for Anglers
The frustration of hitting the water, casting blind, and wondering what's really happening beneath the surface is something every angler knows. It feels like you're guessing, hoping for a bite without any real understanding of the fish's world. This guide is here to eliminate that guesswork, showing you that advanced technology isn't just for pros with huge budgets; you can find an incredibly effective fish finder under $300 that will revolutionize your Kansas fishing experience.
Why a Fish Finder is a Smart Investment for Any Angler
Let's be real: fishing without a fish finder can sometimes feel like trying to find a needle in a haystack, especially on vast Kansas reservoirs like Milford Lake or Cheney Reservoir. You might be casting over barren bottom, completely missing the structure, baitfish, or even the target species you're after. A fish finder changes that entirely, giving you a literal window into the underwater world. It's not just a gadget; it's a tool that provides actionable intelligence, allowing you to fish smarter, not harder. Even an entry-level unit can dramatically increase your success rate, turning frustrating outings into productive ones.
Demystifying Sonar: What it Does for You
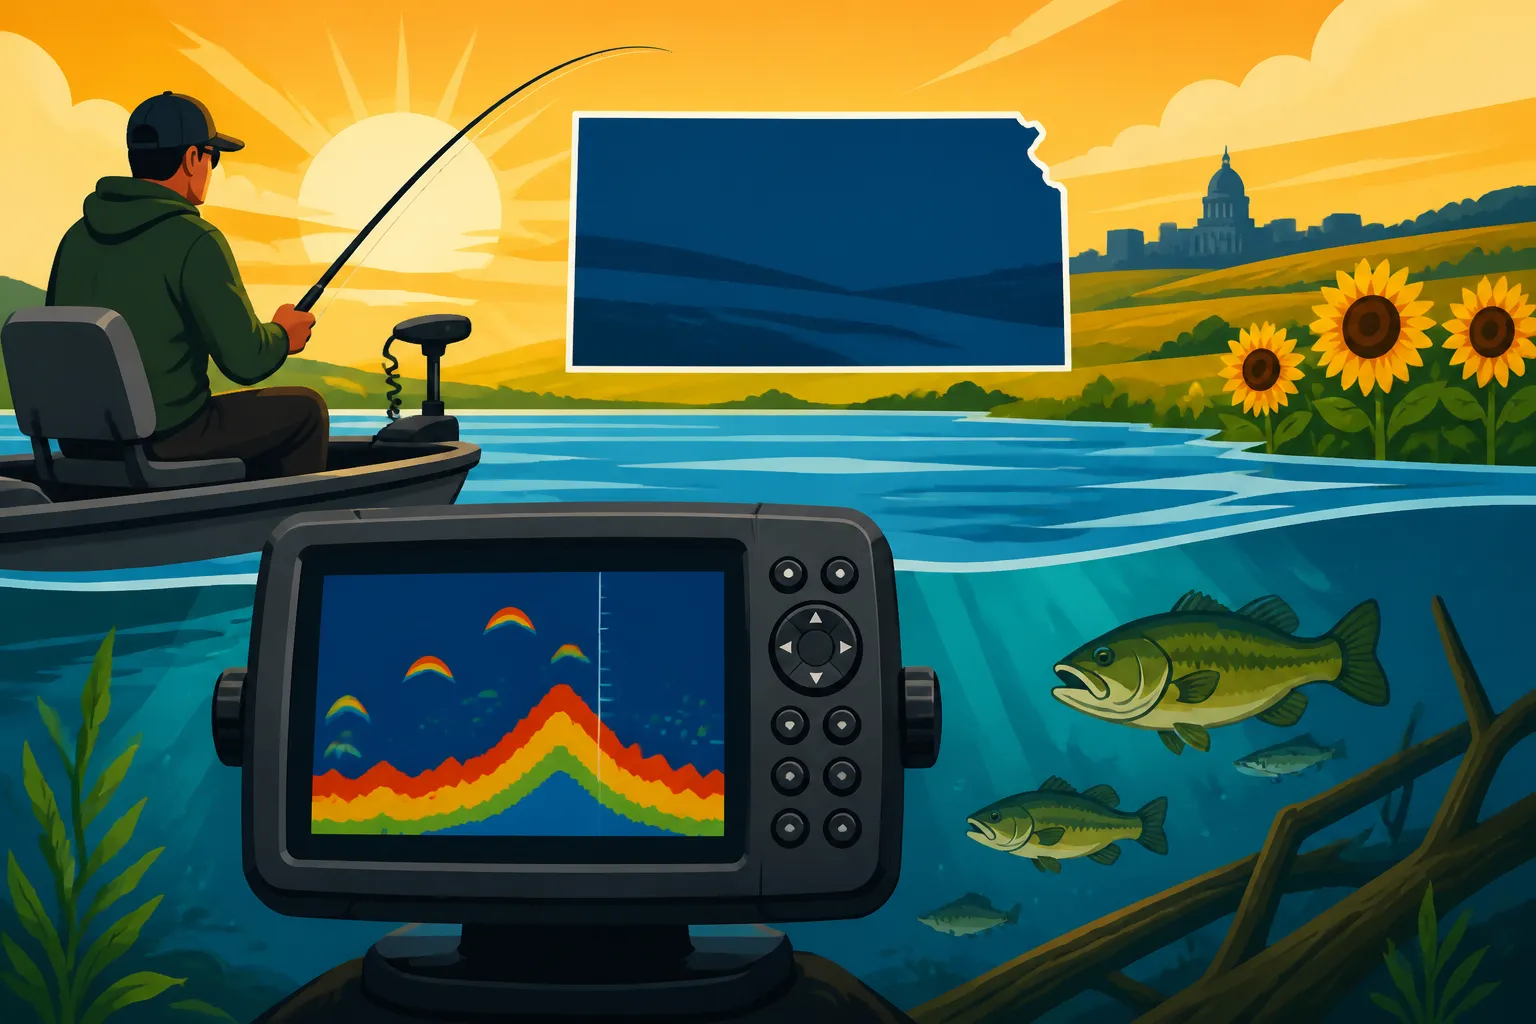
At its core, a fish finder uses sonar technology, which stands for Sound Navigation and Ranging. It's a fancy way of saying it sends out sound waves and listens for the echoes. Think of it like shouting into a canyon and waiting for the sound to bounce back. The time it takes for the echo to return tells the unit how far away an object is. These sound waves travel through the water, hit fish, the bottom, or submerged structures, and then reflect back to the transducer. The fish finder then processes these echoes and displays them as images on a screen, revealing a detailed picture of what's beneath your boat or directly in front of you.
For an angler in Kansas, this means you can see everything from the subtle contours of the lakebed—like those gradual slopes or sudden drop-offs where walleye love to ambush prey—to dense schools of baitfish that attract bigger predators. You'll identify submerged timber, rock piles, or old roadbeds that act as prime habitat. And, of course, you'll see those tell-tale arches or symbols indicating fish. It’s about taking the guesswork out of locating fish and understanding their preferred habitat, making your time on the water much more efficient.
Leveling the Playing Field on a Budget
Many anglers assume that effective fish finders are prohibitively expensive, costing hundreds or even thousands of dollars. While high-end units certainly exist with incredible features, the truth is that modern technology has made truly capable fish finders accessible to almost any budget. For under $300, you can get a unit that provides crisp, clear sonar readings, helping you locate fish and structure with impressive accuracy.
This affordability means that even if you're fishing from a kayak, a small jon boat on a local farm pond, or simply from the bank at a community fishing lake, you can have the same advantage as someone in a much larger, more expensive vessel. It levels the playing field, empowering new anglers and seasoned veterans alike to fish with greater confidence. You're not just buying a screen; you're investing in knowledge and a significant boost to your angling success, all without breaking the bank. Kansas Fishing Techniques for Beginners will become even more effective when paired with a good fish finder.
Essential Features to Prioritize in the Under-$300 Range
When you’re working with a budget, it’s all about smart choices and prioritizing the features that will give you the most bang for your buck. You might not get every bell and whistle, but you can certainly get a highly functional unit that excels at its primary job: finding fish. Knowing what to look for will help you sift through the options and pick the best tool for your Kansas fishing adventures.
The Display: Your Window to the Underwater World
The display is arguably the most crucial component of any fish finder, as it's how you interpret all that sonar data. For units under $300, you'll typically find screens ranging from 3.5 inches up to 5 or even 7 inches. While a larger screen is always nice for clarity and detail, even a well-designed 4- or 5-inch display can be perfectly adequate.
Focus on screen resolution and grayscale or color. A higher pixel count means a sharper image, allowing you to distinguish fish from structure more easily. Color displays, even on budget units, are a huge advantage. They use different colors to represent signal strength, making it much simpler to differentiate between a hard bottom, soft bottom, baitfish, and larger game fish. Imagine trying to read a map with only shades of gray versus a vibrant color map—the difference is significant. Furthermore, consider backlight and contrast settings. Kansas sun can be unforgiving, so a display that performs well in direct sunlight is a must-have. You don't want to be squinting all day, missing crucial information.
Transducers and Sonar Technologies: Your Eyes Beneath the Surface
The transducer is the unsung hero of your fish finder, as it's responsible for sending and receiving those critical sonar waves. In the sub-$300 category, you'll mainly encounter traditional 2D sonar, which is fantastic for general fish finding and bottom interpretation. Look for units that offer dual-beam or wide-angle cone options. A dual-beam transducer allows you to switch between a narrower beam (for better detail directly beneath the boat or in deeper water) and a wider beam (for covering more area and locating fish to the sides of your vessel in shallower water).
Frequency is also important. Lower frequencies (like 50 kHz) penetrate deeper but offer less detail, while higher frequencies (like 200 kHz) provide excellent detail in shallower water but don't penetrate as far. Many budget units offer dual-frequency operation (e.g., 83/200 kHz), giving you versatility for different depths and fishing scenarios you might encounter on Kansas lakes. Some might even offer a basic form of Down Imaging or DownScan, which provides a photographic-like view of what's directly below the boat. While not as sophisticated as high-end models, even a basic version can be incredibly helpful for identifying submerged brush piles or standing timber where crappie often hold.
Navigation and Mapping: Basic GPS Functionality
Not all fish finders under $300 will include GPS and mapping capabilities, but if you can find one that does, it’s a huge bonus. Even basic GPS can be incredibly useful. It allows you to mark waypoints—those secret brush piles, productive humps, or even your boat ramp. This means you can return to those exact spots on future trips, eliminating the frustration of trying to relocate a hotspot.
While full-featured chartplotters with detailed lake maps are usually found in higher price ranges, some budget units might offer rudimentary mapping or at least a blank map that shows your boat's track and waypoints. This is invaluable for understanding how you're moving relative to structure or marking key areas. For an angler exploring new waters or trying to navigate complex shorelines, having even basic GPS functionality is a game-changer. Imagine finding a perfect fishing spot for Kansas Walleye Fishing Techniques and being able to come back to it next time!
Portability and Power: Matching Your Fishing Style
Your fishing style and vessel (or lack thereof) will heavily influence your choice.
- For Kayak Anglers: Portability is paramount. Look for compact, lightweight units that are easy to mount and remove. Battery life is also a major consideration, as you'll likely be running off a small 12V battery. Many of these units come with portable kits or can be easily adapted for kayak use. They often have transom-mount transducers that can be adapted for through-hull or temporary suction cup mounts on a kayak. Kansas Kayak Fishing Gear Guide would be a great resource here.
- For Small Boat Owners (Jon Boats, Aluminum Skiffs): You'll have more flexibility. Console-mount or quick-release bracket units are popular. Power can be drawn from your boat's existing battery. Ensure the transducer can be easily transom-mounted or even installed in-hull for a cleaner setup.
- For Bank or Ice Fishing: A truly portable unit with an internal battery or a small, self-contained power source is ideal. These often come with suction cup transducers for temporary boat mounting, or ice fishing transducers that can be dropped through a hole. The ability to carry it easily from spot to spot is key. For Kansas Ice Fishing Guide, portability is non-negotiable.
Consider how you’ll power the unit. Most require a 12V DC power source. For portable setups, a small sealed lead-acid battery or a lithium-ion power pack is common. Make sure the unit you choose is compatible with your preferred power solution.
Navigating the Market: Finding the Best Value for Your Dollar
The market for fish finders, even in the budget category, can feel a bit overwhelming. There are several reputable brands that consistently deliver quality and features, even at lower price points. It's about knowing what these brands generally offer and where to look for the best deals.
Understanding Different Brands and Their Entry-Level Offerings
When you're looking for a fish finder under $300, you'll quickly become familiar with a few key players. Brands like Garmin, Humminbird, and Lowrance dominate the market, and thankfully, they all offer excellent entry-level models that pack a punch.
- Garmin: Known for user-friendly interfaces and reliable GPS, even their basic Striker series can offer excellent 2D sonar and sometimes even ClearVü (their version of Down Imaging) within the sub-$300 range, often including basic GPS charting. Their menus are typically intuitive, making them a good choice for beginners.
- Humminbird: Their PiranhaMAX and Helix series often have models that fall into this budget. Humminbird is respected for its powerful traditional sonar and sometimes offers SwitchFire technology, which gives you control over how raw sonar returns are displayed. Their displays tend to be very clear, and they often include features like fish ID symbols that are helpful for new users.
- Lowrance: The Hook Reveal or Elite FS series might have smaller screen models that fit your budget. Lowrance units are often praised for their detailed sonar and robust build quality. Some of their budget units even incorporate a basic form of DownScan or SideScan, offering a more detailed view of structure beneath and around your boat.
It’s always a good idea to read user reviews specific to these entry-level models. While brand reputation is important, the performance of individual budget units can sometimes vary. Focus on feedback regarding screen visibility, ease of use, and transducer performance.
Where to Find the Best Deals
Finding a great fish finder under $300 often comes down to knowing where to shop and keeping an eye out for sales.
- Major Retailers: Big outdoor stores like Bass Pro Shops are excellent places to start. You can often see the units in person, get advice from knowledgeable staff, and sometimes even catch a demonstration. They frequently run sales, especially during peak fishing seasons or holidays.
- Online Marketplaces: Websites like Amazon offer a vast selection, competitive pricing, and the convenience of home delivery. You can easily compare features, read countless customer reviews, and often find models that might not be stocked in local stores. Just be sure to check the seller's reputation and return policy.
- Manufacturer Websites: Keep an eye on the official websites of Garmin, Humminbird, and Lowrance. They sometimes offer direct sales, refurbished units, or special bundles that can bring higher-end features down into your budget.
- Secondhand Market: For those comfortable with used electronics, platforms like Craigslist, Facebook Marketplace, or local fishing forums can sometimes yield incredible deals on slightly used units that are still in excellent condition. Just be sure to test the unit if possible and verify its functionality.
Always remember that prices can fluctuate, so a little patience and comparison shopping can go a long way in securing the best deal.
Setting Realistic Expectations for Budget Units
While a sub-$300 fish finder is incredibly capable, it’s important to set realistic expectations. You won’t get all the advanced features found on high-end models, and that’s perfectly okay.
Here’s what you might not get:
- Large, ultra-high-definition touchscreens: Displays will be smaller and typically button-operated.
- Advanced mapping with detailed contours: Basic GPS with waypoint marking is more common than full-blown chartplotters.
- Mega Imaging or Live Sonar: These cutting-edge technologies that show real-time, photo-like images are reserved for much more expensive units.
- Wireless connectivity or networking capabilities: These units are generally standalone.
However, what you will get is a robust, reliable tool that provides clear 2D sonar, helps you locate fish and structure, and can significantly enhance your fishing success. For many anglers, especially those just starting out or fishing smaller bodies of water in Kansas, these essential functions are all you truly need to become a more effective angler. It's about getting the foundational information you need to make informed decisions on the water.
Here's a quick comparison of what you might typically find in fish finders under $300:
| Feature Category | Common Budget Offering | What You Might Sacrifice |
|---|---|---|
| Display | 3.5" – 7" Color (often HVGA or VGA resolution) | Large, high-resolution HD/Full HD, multi-touch screens |
| Sonar Type | Traditional 2D Sonar (83/200 kHz), sometimes basic Down Imaging | Side Imaging, Forward-Facing Sonar, Mega Imaging, Live Sonar |
| GPS/Mapping | Basic GPS (waypoint marking, speed, track recording) | Detailed lake charts (e.g., LakeMaster, Navionics), advanced navigation |
| Transducer | Transom mount (single or dual beam) | Specialized transducers (CHIRP, high-definition Side/Down) |
| Power Source | 12V DC (battery not always included for portable kits) | Integrated rechargeable batteries (often for higher-end portables) |
| User Interface | Button-driven menu system | Intuitive touchscreen controls |
Getting the Most Out of Your Affordable Fish Finder
Buying a budget fish finder is just the first step. To truly reap the benefits, you need to know how to install it correctly, interpret what you're seeing on the screen, and combine that information with your existing fishing knowledge. It's about turning data into fish in the livewell.
Installation Tips for Optimal Performance
Even the most expensive fish finder won't perform well if it's not installed correctly, and this is especially true for budget units where every bit of clarity counts.
- Transducer Placement is Key: For boat-mounted units, the transducer needs to be in clean, undisturbed water. Mounting it too high will cause it to lose contact at speed, too low and it creates drag. Avoid areas near props, through-hull fittings, or other sources of turbulence. On a transom mount, the bottom of the transducer should be slightly below the hull. For kayaks, many opt for an in-hull mount, shooting through the plastic, which provides protection but can slightly reduce signal strength. For portable units used from the bank, a floating or weighted transducer that hangs straight down into the water is ideal.
- Power Source: Ensure a clean, dedicated power connection. Avoid wiring directly into noisy circuits like bilge pumps or motors, as electrical interference can degrade your sonar image. A separate 12V battery for your fish finder, especially for smaller boats or kayaks, is often the best solution for clean power and avoiding interference.
- Cable Management: Run transducer and power cables neatly and away from other electrical wiring as much as possible to minimize interference. Secure them to prevent damage.
Taking the time for proper installation will ensure your fish finder gives you the clearest possible picture of the underwater world, whether you're fishing Kansas River Catfish Spots or seeking out crappie in a brush pile.
Learning to Read and Interpret the Screen
This is where the magic happens, and it takes a bit of practice. Don't expect to understand everything instantly.
- Understanding Arches: Fish typically appear as arches or inverted "V" shapes. A strong, complete arch usually indicates a fish swimming through the sonar cone. Bigger arches usually mean bigger fish. Sometimes, especially with stationary fish or very narrow beams, they might just appear as a line or a blob.
- Interpreting Bottom: The bottom contour will be clearly displayed. A thick, vibrant bottom line usually indicates a hard bottom (rock, gravel), while a thinner, less intense line suggests a softer bottom (mud, silt). The area directly below the bottom line, if colored, indicates bottom hardness or density. Understanding bottom composition is crucial for targeting different species. Walleye often prefer hard bottoms, while catfish might relate to softer, muddier areas.
- Identifying Structure: Submerged trees, brush piles, rock formations, and even old tires will appear as irregular shapes on the screen. Learning to differentiate these from fish is key. For example, a dense brush pile will show up as a solid, often fuzzy mass, and you might see fish arches tucked tightly within or around it.
- Zoom and Sensitivity: Don't be afraid to adjust your settings. Increasing sensitivity can reveal faint returns from baitfish or thermoclines, but too much can lead to clutter. Using the zoom feature allows you to magnify a specific depth range for a more detailed look at fish or structure. When you're fishing Kansas Crappie Fishing Techniques, zooming in on a specific brush pile can be incredibly helpful.
Integrating Technology with Traditional Skills
A fish finder is a tool, not a magic wand. The best anglers combine the information from their fish finder with their traditional angling knowledge and observations.
- Environmental Cues: Pay attention to surface activity, water temperature, wind direction, and current. How does the fish finder information correlate with these cues? If you see baitfish busting on the surface, check your fish finder for schools below.
- Seasonal Patterns: Fish behave differently throughout the year. Knowing that When Does Crappie Spawn Start? and where they move during different seasons helps you interpret what your fish finder is showing you. Are those fish arches on a shallow flat in spring likely crappie moving to spawn? Or deeper, suspended fish in summer likely white bass?
- Trial and Error: Mark waypoints on your fish finder where you catch fish or find promising structure. Over time, you'll build a personal database of productive spots and patterns. Use your unit to explore new areas, identify potential hotspots, and then test them with your rod and reel. This continuous learning process is what makes you a better angler.
- Mapping Your Success: Even basic GPS on a budget unit allows you to mark waypoints. Every time you find a productive brush pile, a sharp drop-off, or a school of actively feeding fish, mark that spot. Over time, you'll build your own personal map of hotspots on your favorite Kansas waters. This is especially useful for targeting species like Kansas Catfish Species Guide which often relate to specific bottom structures.
By thoughtfully installing your budget fish finder, taking the time to understand its readings, and integrating that knowledge with your angling instincts, you’ll unlock a whole new dimension of fishing success in Kansas.
Disclaimer
This article is for general informational purposes only and does not constitute professional advice. Laws, prices and regulations vary by location and change over time. Consult a qualified professional for guidance on your specific situation.