Kansas Fish Finder Buying Guide
It's incredibly frustrating, isn't it? You spend hours on the water, casting your line, feeling hopeful, but all you're really doing is guessing what lies beneath. You know there are fish there—you've heard the stories, seen the photos—but they feel invisible. This guide is here to shed light on that hidden world, helping you navigate the vast and sometimes murky waters of Kansas with confidence by understanding how to choose and use a fish finder to put you on more fish.
Why a Fish Finder is a Game Changer for Kansas Fishing
For years, many of us relied on local knowledge, intuition, and sheer luck to find fish in Kansas lakes and rivers. While there's certainly a charm to that old-school approach, it often means spending more time searching and less time catching. The truth is, modern fishing has evolved, and technology like fish finders can dramatically improve your success rate, especially in diverse Kansas waters.
Overcoming the "Guessing Game" on Kansas Waters
Think about Milford Lake, Cheney Reservoir, or even a smaller state lake – these water bodies are vast, and the fish aren't always where you expect them to be. They follow structure, temperature changes, baitfish, and often suspend in open water. Without a fish finder, you're essentially blindfolded, trying to hit a moving target. This guessing game leads to wasted time, frustration, and often, an empty livewell. A fish finder provides you with an underwater map, revealing depths, bottom contours, submerged timber, weed lines, and most importantly, the fish themselves. It takes the guesswork out of locating those elusive schools of walleye or that hidden brush pile holding crappie.
Imagine this scenario: you're out on Tuttle Creek Lake, renowned for its catfish, but the bite is slow. You're casting blindly along a familiar shoreline, hoping for the best. With a fish finder, you could be cruising slowly, scanning the bottom, and suddenly see a distinct arc on your screen, perhaps near a subtle drop-off or a submerged rock pile. That's a game-changer. You stop, anchor, and present your bait directly to where the fish are holding. This shift from reactive fishing to proactive targeting is what a good fish finder brings to your Kansas angling adventures. Tuttle Creek Lake Catfish Fishing is a great place to put this technology to work.
Enhancing Safety and Navigation on Unfamiliar Lakes
Beyond finding fish, these devices offer significant benefits for safety and navigation, especially if you're exploring new waters or dealing with fluctuating lake levels. Kansas reservoirs can have numerous submerged hazards, from old farmsteads and fence lines to stumps and rock piles. Running aground or damaging your boat's lower unit is a costly and potentially dangerous mistake that many anglers dread.
A fish finder with a good chartplotter and GPS can help you avoid these issues. You can mark safe channels, identify hazardous areas, and navigate confidently, even in low light or unfamiliar conditions. This is particularly valuable on expansive lakes like Wilson Lake, which has many rocky areas, or when exploring the Kansas River, where sandbars and debris can shift. Knowing the contours of the bottom also helps you understand how fish relate to specific structures, giving you an edge beyond just seeing the fish. It’s not just about what's directly beneath you, but understanding the underwater landscape as a whole. Knowing Kansas Boat Registration Guide and local navigation rules always goes hand-in-hand with safe operation.
Understanding the Core Technologies: Sonar and Transducers
At the heart of every fish finder is sonar technology, short for SOund NAvigation and Ranging. It works by sending sound waves into the water and then interpreting the echoes that return. Think of it like shouting into a canyon and listening for the echo – the time it takes for the echo to return tells you how far away the canyon wall is. In fishing, the echoes tell you about the depth, bottom composition, and anything in between, like fish.
How Sonar Works to Reveal the Underwater World
When your fish finder sends out a sound wave, it travels through the water until it hits an object – whether it’s the bottom, a submerged tree, or a fish. When the sound wave strikes an object, part of it bounces back as an echo. The fish finder's transducer (which we'll talk about next) listens for these echoes. By measuring the time it takes for the echo to return and the strength of that echo, the fish finder's processor can determine how far away the object is and how dense it is.
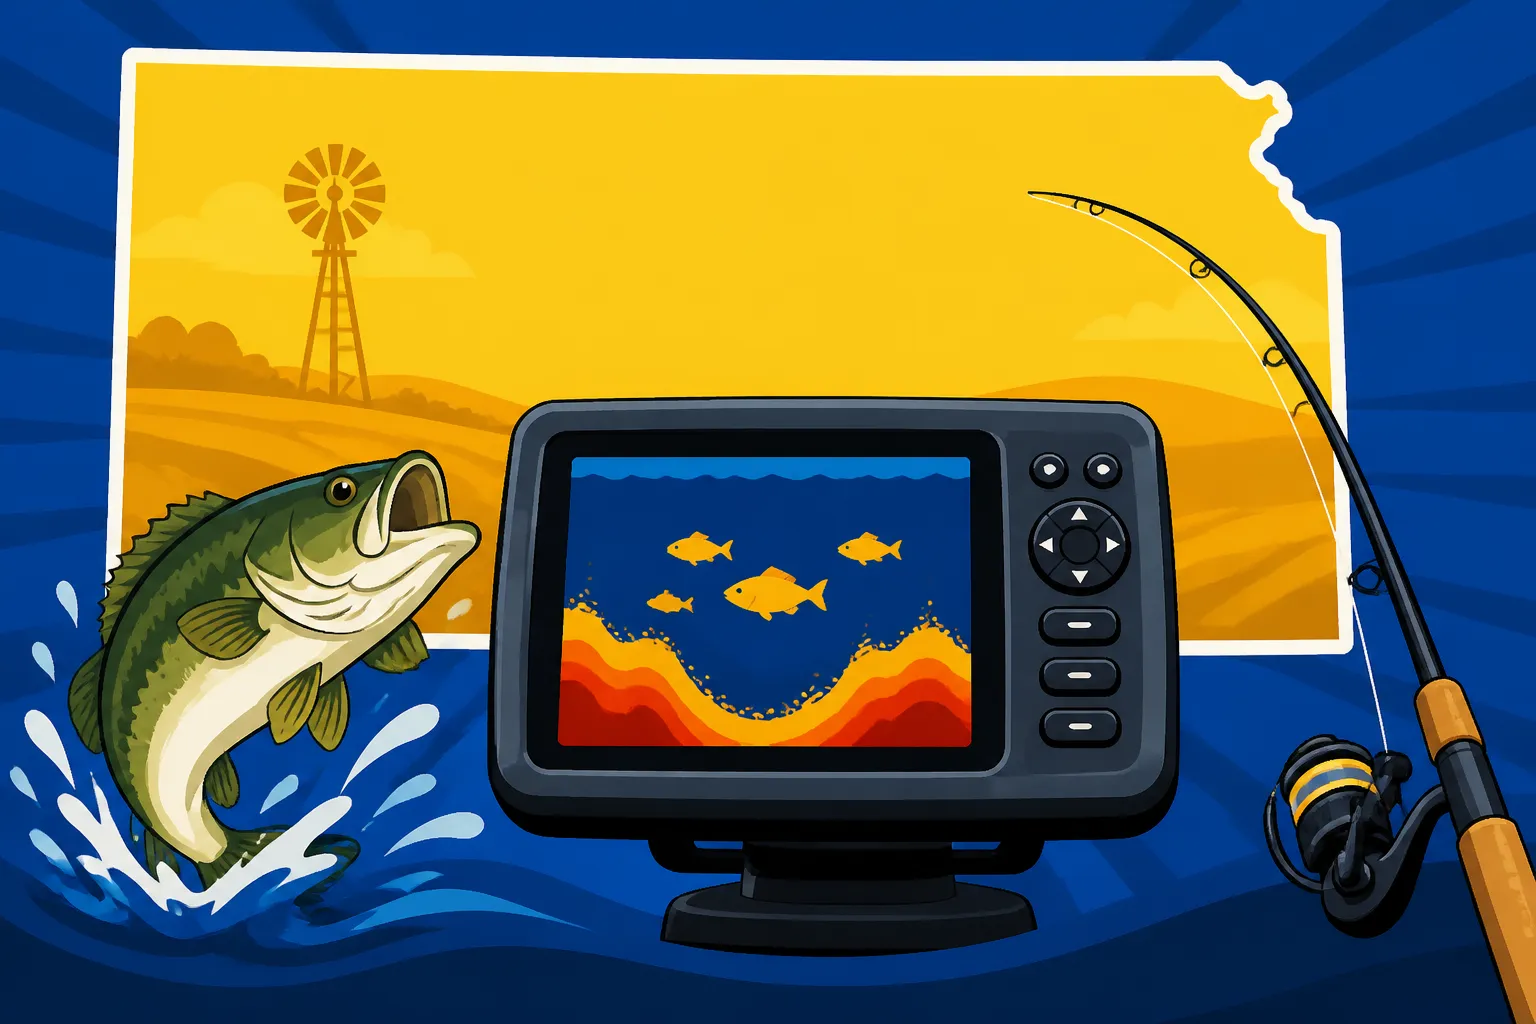
The display then translates this information into a visual representation. Hard bottoms, like rock or gravel, will produce a stronger, thicker return line on your screen, while soft bottoms, like mud or silt, will show a weaker, thinner line. Fish appear as arches or blobs, depending on the sonar type and how they’re moving. The beauty of modern sonar is its ability to differentiate between various objects, giving you a detailed picture of the underwater environment. This technology is fundamental to finding schools of baitfish, which in turn leads you to the game fish you're after, whether it's Kansas Walleye Fishing Techniques or Kansas Crappie Fishing Techniques.
Transducer Types and Their Impact on Imaging
The transducer is the unsung hero of your fish finder system. It’s the part that actually sends and receives those sound waves. The type of transducer you have, and how it’s mounted, can significantly affect the quality and detail of the image you see on your screen.
-
Traditional 2D Sonar (CHIRP): This is the classic "fish arch" sonar. CHIRP (Compressed High-Intensity Radiated Pulse) sonar is an advanced form of 2D that sends a range of frequencies, resulting in much clearer target separation and less clutter. It’s excellent for identifying individual fish and tracking bait balls. For general fishing across various Kansas lakes, a good quality CHIRP transducer is a fantastic starting point. It provides a broad overview, helping you spot fish in the water column and identify changes in bottom depth.
-
Down Imaging (DownScan/ClearVü): Down Imaging uses a very narrow, high-frequency beam that acts almost like a camera, giving you photo-like images directly beneath your boat. You can clearly see submerged trees, brush piles, rock formations, and even distinguish fish from structure with incredible detail. For sight fishing or picking apart specific cover for bass at El Dorado Lake, this technology is invaluable. It helps you understand exactly what you're looking at, removing much of the guesswork from interpreting traditional sonar arches.
-
Side Imaging (SideScan/StructureScan): This is where things get really interesting for covering water. Side Imaging transducers send beams out to the sides of your boat, scanning vast areas of the bottom. This allows you to see structure, cover, and fish not just below, but also to the left and right, often up to hundreds of feet. Imagine cruising down a shoreline at Clinton Lake, and being able to scan brush piles, submerged points, or even the remnants of an old roadbed far off to the side, all without driving directly over them. This drastically reduces the time spent searching and helps you locate hidden hot spots more efficiently. For mapping out complex bottom structures on larger reservoirs, Side Imaging is a must-have.
-
Forward-Facing Sonar (LiveScope/Mega Live): This is the cutting-edge of fish finding. Forward-facing sonar allows you to see real-time images of fish and structure in front of your boat. You can cast to individual fish or watch how fish react to your bait, essentially turning your boat into an underwater observatory. While typically a higher investment, it's a game-changer for targeting specific fish, sight fishing in murky water, or working subtle breaks. It’s a tool that takes immediate interaction with the underwater world to a whole new level.
The type of fishing you do most often in Kansas will guide your transducer choice. If you're a bank angler with a portable setup, a simpler 2D transducer might be perfect. If you're running a bass boat on a large reservoir, you'll likely want a multi-faceted system with 2D, Down, and Side Imaging capabilities.
Key Features to Look For in a Kansas Fish Finder
Choosing a fish finder isn't just about the sonar technology; it's also about the features that enhance your experience and make the data useful. When you're standing in a store like Bass Pro Shops, looking at all the different models, it can be overwhelming. Knowing which features truly matter for Kansas fishing will help you narrow down your options.
Display Size and Resolution for Clarity
One of the most immediate things you'll notice about any fish finder is its screen. A larger screen, generally 7 inches or more, makes a huge difference in how easily you can interpret the information. Imagine trying to identify a subtle break line or a small school of crappie on a tiny, low-resolution screen while your boat bounces on a choppy day at Perry Lake. It's a recipe for headaches and missed fish.
Higher resolution means more pixels, which translates to sharper images and more detail. When you're trying to distinguish a catfish from a submerged log, or a bait ball from a weed line, that clarity is paramount. If you plan to split your screen to view multiple sonar types (like 2D and Side Imaging simultaneously) or combine sonar with mapping, a larger, high-resolution display becomes even more critical. It prevents the images from becoming too small or pixelated to be useful. Investing in a good screen is like giving yourself prescription glasses for the underwater world – everything becomes clearer and easier to understand, reducing eye strain and improving your ability to make quick decisions on the water.
GPS and Mapping for Navigation and Marking Hotspots
Modern fish finders are often much more than just sonar units; many integrate powerful GPS and mapping capabilities that are indispensable for Kansas anglers. A built-in GPS receiver allows you to track your boat's position, speed, and course. This is crucial for navigating large reservoirs, especially when fog rolls in or you're running at night.
But the real power comes with mapping. Many units come pre-loaded with detailed lake maps, showing contours, navigation aids, and even points of interest. For Kansas anglers, this means you can see the depth changes of places like Clinton Lake or Melvern Lake before you even get there. More importantly, you can mark waypoints for every productive spot you find: that brush pile where you consistently catch crappie, the submerged hump where walleye gather, or the specific creek channel where catfish lurk. You can also save tracks of successful fishing patterns, helping you reproduce your results on future trips. Some advanced units even allow you to create your own custom high-definition maps of specific areas, giving you an unmatched advantage on familiar or unfamilar waters. Being able to return to that exact spot time and again, whether it's a Kansas Community Fishing Lake Rules hotspot or a remote river bend, significantly increases your chances of success.
Advanced Features: Wi-Fi, Networking, and Transducer Customization
Beyond the basics, many fish finders offer advanced features that can truly elevate your fishing experience. Wi-Fi and Bluetooth connectivity, for instance, allow you to connect your unit to your smartphone or tablet. This can enable software updates, transfer waypoints, or even allow you to view your fish finder screen wirelessly from another part of the boat – a huge convenience if you're a solo angler trying to keep an eye on things while managing a rod.
Networking capabilities are particularly useful for those running multiple electronics on their boat. Imagine having a trolling motor that can communicate directly with your fish finder's GPS, automatically keeping you on a marked spot or following a contour line. Or syncing multiple fish finder units so you can view different sonar technologies on separate screens. This creates a fully integrated system that works together to enhance your fishing efficiency.
Lastly, look for units that offer extensive transducer customization options. The ability to adjust frequencies, sensitivity, and range can help you fine-tune your sonar to specific conditions, whether you're dealing with murky water in a river or deep, clear water in a reservoir. Being able to dial in these settings can make the difference between seeing faint returns and clearly identifying fish, especially when you're targeting specific species or dealing with challenging environments.
Types of Fish Finders for Different Kansas Anglers
Just like there are different types of fishing, there are different types of fish finders designed to meet the needs of various anglers. The best unit for you will depend on your fishing style, the kind of boat you use (if any), and the species you typically target on Kansas waters.
Portable Units for Bank Anglers and Small Crafts
For many Kansas anglers, especially those who fish from the bank, a kayak, a canoe, or small jon boats, a portable fish finder is an excellent choice. These units are designed for convenience and versatility. They typically consist of a compact display, a battery, and a transducer, often mounted on a suction cup or clamped to the side of your vessel.
The beauty of a portable unit is its mobility. You can easily take it from your car to the bank of a community pond, or from your kayak onto a rental boat for a weekend trip. While they generally offer simpler 2D sonar, many modern portable units still provide excellent depth readings and fish identification. Some even connect wirelessly to your smartphone, turning your phone into the display screen. They are generally more budget-friendly and require less complicated installation, making them perfect for beginners or those who don't have a dedicated fishing boat. For someone just starting out on a small creek or a Kansas Farm Pond Fishing Tips excursion, a portable unit provides valuable insight without the commitment of a full-blown fixed-mount system.
Fixed-Mount Systems for Power Boats and Larger Vessels
If you primarily fish from a bass boat, a pontoon, or a larger V-hull on Kansas reservoirs like Milford Lake or Clinton Lake, a fixed-mount fish finder system is likely what you'll need. These units are permanently installed on your boat, with the transducer typically mounted on the transom, through-hull, or on the trolling motor.
Fixed-mount systems offer the most power, largest screens, and widest array of features, including advanced sonar technologies like Down Imaging, Side Imaging, and sometimes even forward-facing sonar. They are designed for durability and performance in all conditions, providing detailed information at higher speeds. With larger displays, these units can often split the screen to show multiple data points simultaneously—like a detailed chart, 2D sonar, and Side Imaging—giving you a comprehensive view of your surroundings. These systems are often expandable, allowing you to network them with other marine electronics like radar, autopilot, or additional displays. For the serious angler who spends a lot of time on the water, a robust fixed-mount system is an essential investment for navigating Best Boats for Kansas Reservoirs and effectively targeting fish across vast stretches of water.
Specialized Finders: Kayak, Ice Fishing, and Bowfishing
Kansas anglers participate in many diverse forms of fishing, and there are specialized fish finders for many of these niche activities.
-
Kayak Fishing: For kayak anglers exploring the shallow rivers or quiet coves of Kansas, compact, often battery-powered units are perfect. Many high-end kayak-specific fish finders incorporate Side Imaging or Down Imaging with specialized transducer mounts for easy deployment and retrieval. Brands like Humminbird and Garmin offer excellent options for paddlers. These units are designed to be waterproof, durable, and compatible with the limited space on a kayak. Kansas Kayak Fishing Gear Guide offers more insights into optimizing your setup.
-
Ice Fishing: When winter truly sets in and the ice thickens on lakes like Glen Elder, ice anglers turn to specialized flasher units or small, portable fish finders. Flashers provide a real-time, circular display of what's beneath your hole, showing fish, bait, and your lure in incredible detail. Many portable fish finders also have ice fishing modes that offer traditional vertical sonar views. They come with special weighted transducers that drop into the ice hole, allowing you to see exactly what's happening under the ice. These units are crucial for success during the colder months when fish are less active and precision is key. Learn more about how to stay on the fish during the cold season by checking out Kansas Ice Fishing Guide.
-
Bowfishing: While less common, some bowfishing enthusiasts even use fish finders to locate rough fish like carp or gar, especially in murky water where visibility is poor. These often involve basic 2D sonar to identify large targets lurking just below the surface, giving the bowfisherman an advantage in placing their shots.
These specialized units cater to the unique challenges and requirements of different angling pursuits, ensuring that no matter how you fish in Kansas, there's a fish finder designed to help you succeed.
Installing and Setting Up Your Fish Finder
So, you've picked out your new fish finder. Congratulations! The next crucial step is getting it properly installed and set up. A poorly installed unit, especially the transducer, won't perform to its potential, leading to frustration and inaccurate readings.
Transducer Mounting and Placement Tips
The transducer is the "eyes and ears" of your fish finder, so its placement is paramount. For fixed-mount units on power boats, the most common placement is on the transom of the boat. The goal is to mount it in an area where it's always submerged and has a clear, unobstructed "view" of the water below, even when the boat is on plane.
- Transom Mount: This is the easiest for most boats. You'll want to place it as far back on the transom as possible, in an area free from turbulent water caused by the motor or prop. The transducer face should be slightly below the hull, parallel to the water's surface when the boat is sitting still. Too high, and it will lose signal at speed; too low, and it can cause spray or damage. Many anglers also mount a second transducer on their trolling motor for clearer readings at slow speeds, especially with Side Imaging.
- Through-Hull Mount: For fiberglass boats, a through-hull transducer can be glued inside the hull (a "shoot-through" transducer) or mounted with a hole drilled through the hull. Shoot-through transducers offer protection from damage but can have slightly reduced performance. Drilled through-hull transducers offer the best performance, as they have direct contact with the water, but require professional installation to ensure no leaks.
- Trolling Motor Mount: For many serious anglers, mounting a dedicated transducer to the trolling motor is essential, especially for precise slow-speed scanning with Down and Side Imaging. This ensures the transducer is always in clean water, regardless of boat speed or trim.
When mounting, always test your placement first. Run your boat at various speeds, watching the screen for clear, consistent readings. If you're getting a lot of static, "snow," or losing bottom at speed, your transducer likely needs adjustment. Taking the time to get this right will save you countless headaches and ensure you're getting the most out of your investment.
Powering Your Unit and Cable Management
Proper power supply is just as important as transducer placement. Fish finders need a clean, consistent power source to operate effectively. Always connect your unit directly to your boat's battery with an inline fuse, avoiding splicing into existing wiring for other accessories. This minimizes electrical interference and ensures your unit receives adequate voltage. Use marine-grade wire and connectors, and ensure all connections are waterproofed to prevent corrosion.
Cable management, while often overlooked, is crucial for both functionality and safety. Route your transducer and power cables away from high-traffic areas where they could be stepped on or snagged. Use cable ties or clamps to secure them neatly along the gunwales or inside compartments. Avoid running transducer cables alongside power cables, as this can introduce electrical interference that degrades your sonar image. If you're setting up a kayak, consider a dedicated battery box for your portable unit, and use dry bags to protect all electronics and wiring from splashes. A tidy installation not only looks better but also prevents damage and potential performance issues down the line. Remember, a robust Kansas Fishing Gear Guide often includes tips for protecting your electronics.
Initial Setup and Basic Settings Adjustments
Once installed and powered up, it’s time to dial in your settings. Most modern fish finders have an auto mode that works well for basic use, but to truly maximize performance, you'll want to explore the manual settings.
- Sensitivity/Gain: This controls how much detail your sonar picks up. Too low, and you'll miss faint returns like baitfish; too high, and you'll get excessive clutter. Start in auto and then manually adjust it up until you see some noise, then back it off slightly.
- Range/Depth: Set your depth range just below the current depth you're fishing. This zooms in the display, providing more detail of the water column you're interested in.
- Frequency: If your unit has multiple frequencies (e.g., 83/200 kHz for 2D sonar), experiment with them. Lower frequencies penetrate deeper and offer a wider cone angle, good for general searching. Higher frequencies provide more detail and better target separation in shallower water or for identifying structure.
- Chart Speed: This controls how fast the sonar history scrolls across your screen. A faster speed gives a more detailed, real-time view, while a slower speed compresses the history. Adjust based on your boat speed and how quickly you want to see changes.
Don't be afraid to experiment with these settings as you fish different areas of Kansas lakes or rivers. What works well on a deep reservoir might not be ideal for a shallow, muddy river. Taking the time to understand and adjust these settings will unlock the full potential of your fish finder and help you interpret the underwater world with greater accuracy.
Maximizing Your Fish Finder's Potential on Kansas Waters
Having a fish finder is one thing; truly understanding and utilizing it to its fullest potential is another. It's not just about seeing pretty pictures on a screen; it's about interpreting that information to make smarter fishing decisions.
Interpreting Sonar Readings: Fish Arches, Structure, and Bottom Composition
Learning to read your fish finder's display takes practice, but it's an incredibly rewarding skill.
- Fish Arches: On traditional 2D sonar, fish often appear as arches. A strong, well-defined arch usually indicates a larger fish directly under your transducer's cone. Smaller, weaker arches or blobs might be smaller fish or fish on the edge of the cone. The length of the arch can also give you a clue about how long the fish was under the cone, which relates to its size and your boat speed. Pay attention to where these arches appear – are they near the bottom, suspended in the water column, or grouped in a bait ball? For example, during the Kansas Spring Crappie Fishing Tips season, you might see dense schools of crappie relating tightly to submerged brush, appearing as a cluster of arches within the structure.
- Structure: This is critical for finding all species. Your fish finder will reveal submerged trees, brush piles, rock formations, humps, ledges, and creek channels. These appear as distinct shapes and contours on your screen. Down and Side Imaging excel here, providing photo-like detail. A crisp, irregular shape could be a log, while a softer, more rounded lump might be a mud hump. Learning to identify these features helps you understand where fish might be hiding. For targeting Kansas Catfish Daily Limits, you'll often be looking for deep holes, channel swings, or log jams that provide cover and current breaks.
- Bottom Composition: As mentioned earlier, the thickness and intensity of the bottom return tell you about its hardness. A thick, bright bottom line suggests rock, gravel, or hard clay – often preferred by walleye for spawning or feeding. A thinner, softer line indicates mud or silt, which can hold baitfish or catfish. Some units even have a "bottom composition" feature that uses different colors to represent different hardness levels. Understanding the bottom helps you choose the right bait and presentation for the species you're targeting.
It's a lot to take in at first, but with time on the water and a willingness to observe, you'll start to recognize patterns and become adept at reading the underwater landscape.
Using GPS and Mapping for Strategic Angling
Your fish finder's GPS and mapping features are powerful strategic tools, not just for navigation.
- Mapping Contours: Use detailed maps to identify potential hotspots before you even drop a line. Look for sharp drop-offs, underwater points, humps, or old creek channels that intersect with the main lake bed. These are prime locations where fish will congregate. For example, Milford Lake Walleye Fishing often means focusing on the numerous rocky points and submerged humps revealed on your map.
- Marking Waypoints: Every time you catch a fish, especially if it's a good one or part of a pattern, mark that spot as a waypoint. Over time, you'll build a personal library of productive spots. You can also mark areas of interest, like baitfish schools, significant structure, or even potential hazards. Don't be shy about marking everything! When you're fishing a vast body of water like Cheney Reservoir, having specific waypoints for Cheney Reservoir Walleye Fishing or Cheney Reservoir Wiper Fishing can save you hours of fruitless searching.
- Tracking Routes: Some units allow you to record your tracks. This can be useful for repeating successful trolling passes or for navigating complex areas. You can also use tracks to avoid areas where you didn't find fish, helping you optimize your time on the water. Plotting a course along a contour line with your GPS allows for incredibly precise trolling passes, keeping your lures in the strike zone longer.
By actively using the GPS and mapping, you transition from randomly exploring to strategically targeting productive areas, significantly increasing your efficiency and catch rates.
Pairing with Other Gear: Trolling Motors and Fishing Techniques
Your fish finder doesn't operate in a vacuum; it becomes even more effective when integrated with other fishing gear and techniques.
- Trolling Motors with Integrated Sonar: Many modern electric trolling motors, especially those with GPS features, come with built-in transducers that communicate directly with your fish finder. This provides incredibly clear sonar readings, free from motor noise, especially when you're moving slowly. Furthermore, GPS-enabled trolling motors can "spot-lock" your boat in place over a marked waypoint or automatically follow a contour line, freeing you up to focus on fishing while your fish finder continues to scan. This synergy is invaluable for holding steady over a brush pile for crappie or slowly working a walleye flat. Kansas Trolling Motor Guide can offer more insights here.
- Understanding Specific Techniques: Your fish finder informs your fishing techniques. If you see fish suspended at 15 feet over 30 feet of water, you'll know to use a mid-water column presentation, like a jig or a crankbait, rather than a bottom-hugging rig. If you see a dense school of baitfish with larger arcs below them, you know you're in a feeding zone and can adjust your lure selection accordingly. For example, if you're trying Kansas White Bass Run Timing on a river, and you see a massive school of shad on your screen, you know exactly where to cast those small spoons or inline spinners.
- Reading the Conditions: Beyond fish, your unit can show you water temperature, which is crucial for many species, and sometimes even water clarity depending on the sonar return. Combining this data with weather patterns allows you to predict fish behavior and adjust your strategy. A good fish finder is truly a window into the underwater world, and the more you learn to use it in conjunction with your fishing instincts and gear, the more successful you'll be.
Common Pitfalls and Troubleshooting
Even the best fish finders can run into issues. Knowing how to diagnose and troubleshoot common problems can save you a lot of frustration and keep you on the water. Many issues stem from improper installation or simple overlooked settings.
Dealing with False Readings and Interference
It's disheartening to see a screen full of "fish" only to drop your line and find nothing. False readings and interference are common complaints, but often solvable.
- Electrical Interference: This is perhaps the most common culprit. It appears as random lines, dots, or "snow" on your screen, making it hard to distinguish real targets. Sources can include your boat's engine, bilge pump, livewell pump, or even poorly routed power cables (transducer cables running alongside power cables are a big no-no).
- Troubleshooting: Ensure your fish finder is wired directly to the battery with an inline fuse. Check all connections for corrosion. Try isolating the problem by turning off other boat electronics one by one to see if the interference disappears. You can also try adjusting your sensitivity down slightly, but be careful not to miss actual fish.
- Aerated Water (Turbulence): If your transducer is mounted in turbulent water (e.g., behind a strake, too close to the prop, or too high), air bubbles will pass over its face, scattering the sonar signal. This results in a loss of bottom reading or a screen full of noise, especially at speed.
- Troubleshooting: Check your transducer's mounting position. It should be in clean, undisturbed water. Make sure it's slightly below the hull, and its face is parallel to the water's surface. Sometimes a minor adjustment of an eighth of an inch can make all the difference.
Understanding these common sources of interference helps you quickly identify and address issues, ensuring your unit is giving you the most accurate picture possible.
Software Updates and Unit Maintenance
Just like your smartphone, fish finders receive software updates. These updates often include performance enhancements, bug fixes, new features, or updated map data. Ignoring them can mean you're missing out on improved functionality.
- Keeping Your Software Current: Most modern units can be updated via Wi-Fi, a smartphone app, or by downloading the update to an SD card and inserting it into your unit. Check the manufacturer's website (like Garmin or Humminbird) regularly for the latest versions. Running outdated software can sometimes lead to connectivity issues or reduced performance. A quick check before your Kansas Spring Fishing Guide adventure can make a difference.
- Physical Maintenance: Keep your screen clean! Use a soft, damp cloth and avoid harsh chemicals that can damage the display. Periodically check your transducer and cables for any signs of damage, cuts, or marine growth. Algae or barnacles on the transducer face can significantly impede its performance. Gently clean it with a soft brush or sponge. For units used in saltwater (though less common for Kansas fishing, it's good practice), rinse them with fresh water after each outing. Proper maintenance ensures the longevity and reliable performance of your investment.
Dealing with Power Issues and GPS Signal Loss
Sometimes problems are simpler, relating to power or GPS reception.
- Power Issues: If your unit randomly shuts off, won't turn on, or dims, it's usually a power problem.
- Troubleshooting: Check your battery voltage. Is it fully charged? Check all wiring connections for looseness or corrosion. Inspect the inline fuse – it might be blown. If you have multiple electronics, consider a dedicated battery for your fish finder to prevent voltage drops.
- GPS Signal Loss: If your unit can't acquire a GPS signal or shows "No GPS," there are a few things to check.
- Troubleshooting: Ensure your unit has a clear view of the sky. Tall trees, buildings, or even a boat cover can block the signal. If your unit uses an external GPS antenna, check its connections and placement. Sometimes, a simple power cycle (turning the unit off and on) can resolve temporary signal glitches. For systems with integrated GPS, ensure the boat is outdoors and not under cover when trying to acquire a signal.
By familiarizing yourself with these common issues and their fixes, you’ll be better equipped to troubleshoot problems quickly and get back to finding those Kansas fish.
Top Considerations When Buying Your First Fish Finder
Deciding on your first fish finder can feel like a big step. There are so many options, so many features, and a wide range of prices. To make the best choice for your Kansas fishing adventures, it's helpful to consider a few key factors that align with your personal fishing style and budget.
Budget: Entry-Level vs. Mid-Range vs. High-End Units
The price of fish finders can vary dramatically, from a couple of hundred dollars to several thousand. It's important to set a realistic budget from the start.
- Entry-Level (Often under $300-400): These units typically offer basic 2D sonar, a smaller screen (4-5 inches), and sometimes rudimentary GPS with limited mapping. They're excellent for bank anglers, small boat owners, or beginners who primarily fish shallower waters like community ponds or smaller state lakes. They provide fundamental depth readings and fish identification without breaking the bank. You can find some solid entry-level options on platforms like Amazon or in stores like Bass Pro Shops.
- Mid-Range ($400-$1000): This is where you start to see significant jumps in features. Units in this category usually boast larger, higher-resolution screens (7-9 inches), integrated GPS with detailed mapping, and often include Down Imaging and Side Imaging capabilities. This range offers the best "bang for your buck" for many serious Kansas anglers who fish from medium-sized boats on reservoirs and want advanced features without the top-tier price tag. They're versatile enough for a wide range of species and conditions.
- High-End ($1000+): These are the flagship models, offering the largest screens (10+ inches), all available sonar technologies (including forward-facing sonar), highly detailed mapping with custom mapping capabilities, advanced networking, and superior processing power. These are for tournament anglers or those who demand the absolute best performance and integration with their boat's electronics. For chasing trophy walleye on Best Walleye Lakes in Kansas or dissecting intricate structure on large reservoirs, these units provide an undeniable advantage.
Remember, the most expensive unit isn't always the "best" for your needs. Prioritize the features that directly benefit your fishing style.
Target Species and Fishing Locations
The type of fish you target and where you fish them heavily influence the features you'll need.
- Walleye Anglers: Walleye often relate to rocky structure, humps, and subtle depth changes. A unit with good 2D sonar for identifying fish arches near the bottom, and especially Side Imaging for scanning expansive flats and points, will be invaluable. Detailed mapping to highlight contour lines is also a huge plus.
- Catfish Anglers: Catfish often lurk in deeper channels, log jams, and holes in rivers and reservoirs. Strong 2D sonar to find deep holes, Down Imaging to identify structure like submerged timber, and good mapping to locate river channels are key. For Kansas Catfish Daily Limits, a unit that clearly shows bottom transitions will be a huge asset.
- Crappie Anglers: Crappie love brush piles, submerged trees, and bridge pilings. Down Imaging and Side Imaging are incredibly effective for pinpointing these vertical structures and seeing the schools of crappie holding within them. A high-resolution screen will help you differentiate individual fish within a tight school. For Kansas Crappie Length and Bag Limits, precision spotting can make your trip much more efficient.
- Bass Anglers: Bass relate to almost any kind of cover. Side Imaging for covering water and finding hidden structure, Down Imaging for dissecting brush piles, and perhaps even forward-facing sonar for targeting specific fish in cover, are all highly beneficial. GPS with detailed mapping helps in identifying prime ambush points and navigating complex shorelines.
- Rivers vs. Reservoirs: If you primarily fish Kansas rivers, strong 2D sonar for current breaks and holes, and basic GPS for navigation, might suffice. For large reservoirs, the ability to cover vast areas with Side Imaging and detailed mapping becomes much more critical.
Consider your primary fishing grounds. Do you mostly hit Kansas River Fishing Guide spots, or do you spend weekends exploring Best Fishing Lakes in Kansas? Your answer will guide your feature set.
Ease of Use and Technical Support
Finally, don't underestimate the importance of a user-friendly interface and reliable customer support.
- User Interface: Some fish finders are incredibly intuitive, with straightforward menus and easily accessible settings. Others can have a steeper learning curve. If you're new to fish finders, look for a unit that feels comfortable to navigate. Many manufacturers offer online tutorials or simulators that can give you a feel for their software before you buy. You want to spend your time fishing, not fumbling with buttons.
- Technical Support and Warranty: Research the manufacturer's reputation for customer service and warranty policies. You want to know that if you encounter an issue or have a question, you can get reliable assistance. Reading user reviews on sites like Amazon or fishing forums can give you insight into real-world experiences with different brands' support. A good warranty provides peace of mind, knowing your investment is protected. Visiting a local outdoors store like Bass Pro Shops can also give you the opportunity to talk to knowledgeable staff and sometimes even demo units, helping you gauge ease of use firsthand.
By carefully considering your budget, fishing style, and support needs, you can choose a fish finder that will genuinely enhance your time on the water, turning those blind guesses into confident casts.
Disclaimer
This article is for general informational purposes only and does not constitute professional advice. Laws, prices and regulations vary by location and change over time. Consult a qualified professional for guidance on your specific situation.